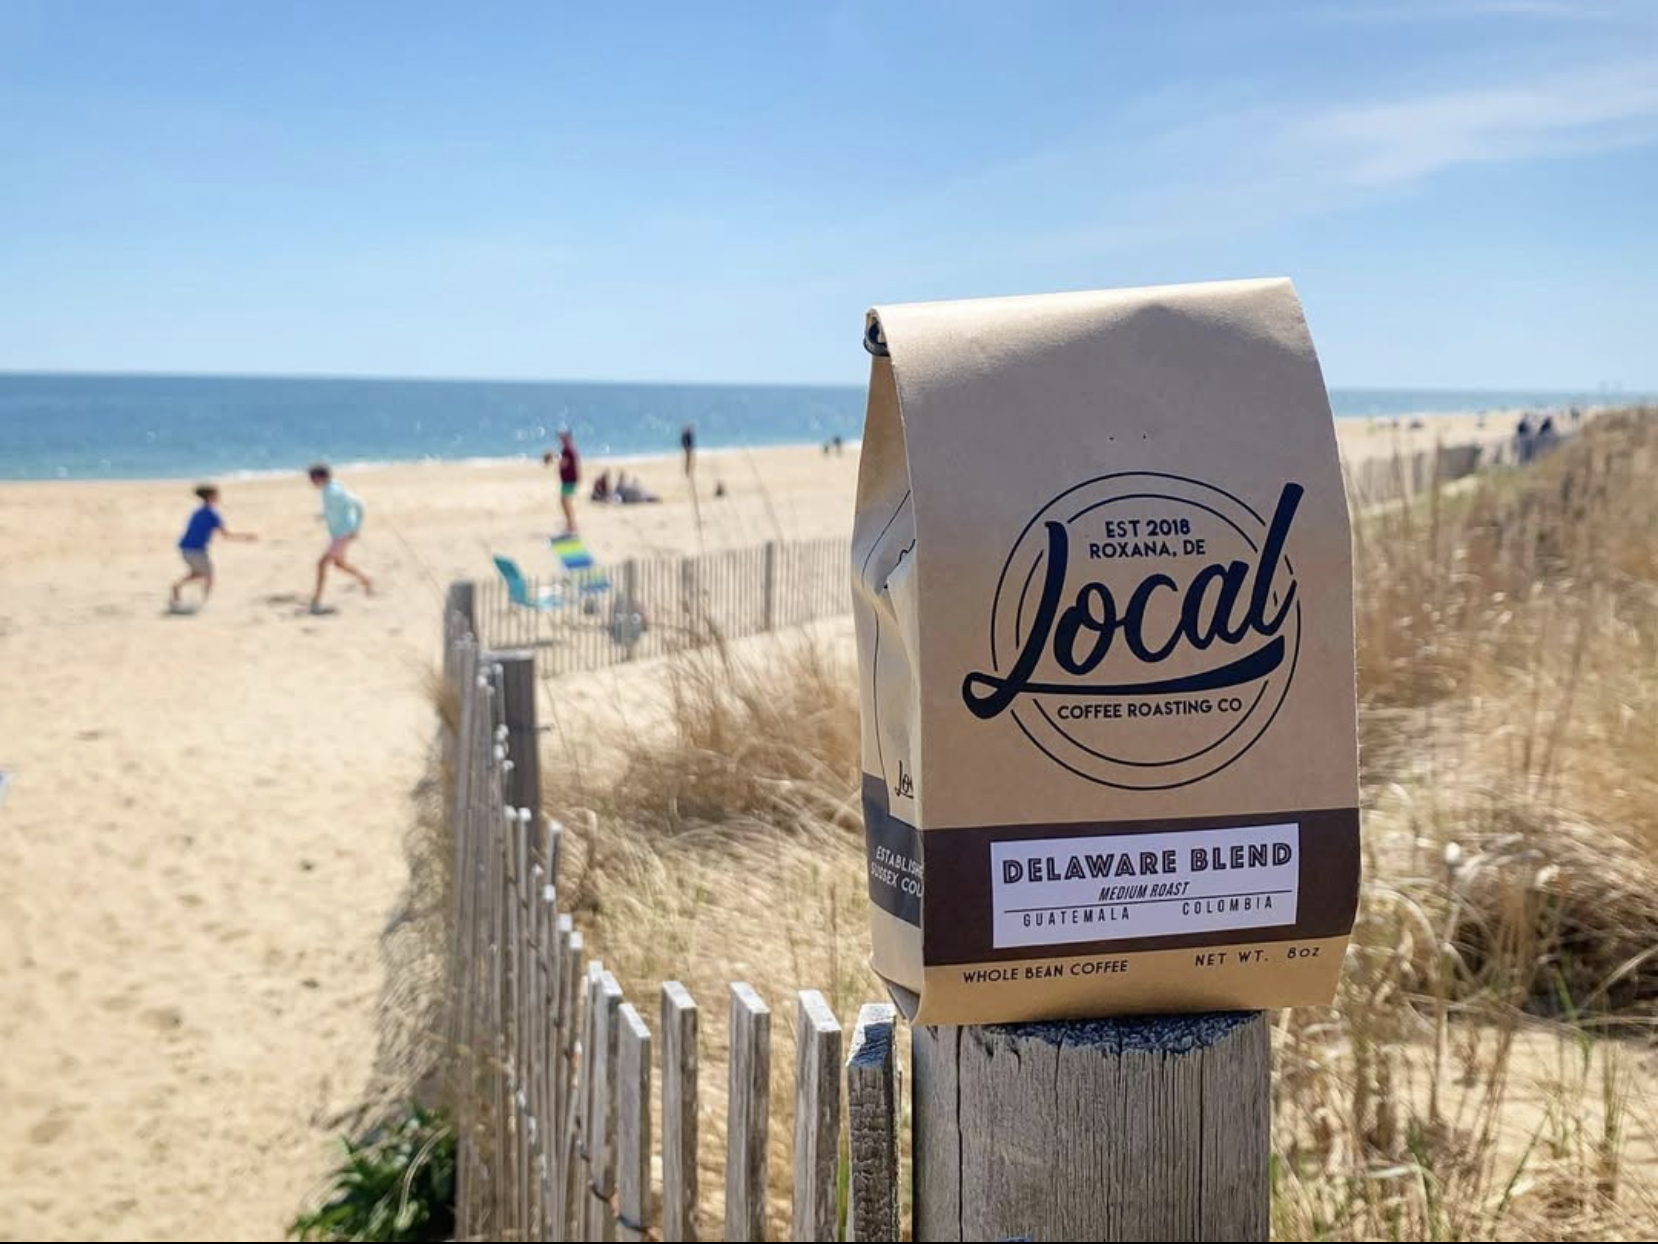
Blog

  • LAN Wiring 101

    I am getting a remedial course in network wiring this week. I’ve been lucky in the past, as all of my CAT 5/6 wiring has “just worked”. Sadly, my luck ran out the other day, when I tried to rewire the uplink for a 5-port switch in my basement office. I have two uplink wires running to my basement patch panel, and oddly, the switch’s jack worked when patched through to one of them, but not the other. Both uplinks worked when I plugged my laptop into them directly, so I was rather baffled. At that point, I decided it was finally time to invest in a network cable tester. I picked up a Klein LAN Scout Jr 2 from Lowe’s, and it immediately identified the problem: The switch’s jack’s wiring was bad (pins 1&2 open), uplink 1 was wired straight, and uplink 2 was wired crossover. The good news was that of the 7 jacks I tested, only 2 turned up bad, and they’re both short runs that wouldn’t be too hard to replace if I choose. Interestingly, both of the older jacks that I rerouted to the patch panel were wired crossover. It was 10 or 15 years ago that I installed the jacks, and I thought I remembered wiring everything with T568B, but apparently, I was wrong. I probably won’t bother re-punching them, as I don’t use either jack much (one of them I had actually never wired up) and they both still work thanks to Auto-MDIX. I do know now to check the wiring at the other end before punching a wire in to the patch panel (you’d think that would be obvious, but this is me we are talking about). As for the bad jacks, I’m not sure if the issue is with the cables or the punches (or both), but either way, it’s good to have a way to test the wiring. As a case in point, I crimped an RJ45 plug this evening, and accidentally swapped pins 1 and 2. Without the cable tester, I likely wouldn’t have known about it until something didn’t work right, and then I would have been pulling my hair out. I’d say the tester paid for itself right there.

    Update 2/28: Mystery solved- both bad jacks turned out to be wires that weren’t punched all the way down in the patch panel. After fixing that, they both test good. The basement patch panel is now fully wired, with 4 free jacks available for future use. Next up is the library closet. As an aside, so far, every jack I wired “back in the day” has turned out to be T568A.

  • Winter Projects

    Winter Projects

    I’m no longer quite the home improvement addict I used to be “back in the day”, but in the wintertime, I like to have at least one project to keep me busy around the house. Otherwise, I end up wasting too much time on the computer when I’m home. As I wrote earlier, I’m currently working on some home LAN upgrades. I’ve had something of an epiphany in the 3 days since that post. After waffling over where I should mount my switches and run my new wires, I did some reading and learned more about structured wiring, and now, rather than terminating my wiring at switch ports, I’m installing CAT-6 patch panels. That will give me permanent termination points for all of my existing wiring, which I can then patch into switches as needed. Right now, I’m in the process of wiring the first panel up in the basement boiler room, which will handle all of the cabling that runs through the west half of the basement. There are two existing CAT-5e cables that run from this area up to the switch in the library closet. My original plan was to run a single CAT-6 uplink and pull the two CAT-5e cables out, but now I’m going to leave the latter in place as well, and terminate them at the patch panel I intend to install in the library closet. That will let me move things around between the basement and upstairs switches as needed, just by moving patch cables around. The more I think about it, the more I understand why large enterprise LANs are wired this way. It might be overkill for most houses, but for this house with all of its wiring challenges, I think it makes a lot of sense. After I finish the basement, I’ll move on to the library closet. After that, I want to put something on the east side of the house, but I haven’t made up my mind exactly where yet.

    My next project arose out of necessity. Our pool is losing water at a rather alarming rate in the winter. This year, it is down over 2 feet since we closed it. Before the big 2026 SnowCrete Apocapalypse, we took the cover off, as the water level was too low to support a snow load on the cover. That gave me an opportunity to observe the water level every day. It continued to drop for a while, and now it seems to finally have stabilized at around where the light fixture conduit enters the pool in the shallow end (the deep end conduit is a couple inches lower). This is a common place for in-ground concrete pools to start leaking, as the sealant starts to fail over time. I suspect that what sealant is still there is hardening and shrinking in the winter, causing the pool to lose water in cold weather (it doesn’t seem to lose water nearly as fast in the summer).

    Today, with the pool water mostly un-frozen, I put my hip waders on, got in the pool, and pulled the shallow-end light fixture out. Then, I looked over and saw that the deep-end fixture had fallen out of its niche on its own. Not sure how or when that happened, but I’m guessing it might have been from freeze-thaw, with the water level being so low. I took a couple of photos of the shallow end niche, but after some recent rain, the conduit opening was still underwater, and it was a little hard to see how much (if any) sealant was there. Before the water leaks back down, I think I’m going to try to do a dye test to confirm that it’s leaking there. Regardless, I think it’s about time for new light fixtures. The existing fixtures still work, but they’re very old 500-watt monsters made by Paragon, a company that is no longer around.1 A company called Spa Electrics makes a nice-looking retrofit 12-volt LED fixture that I think I could use. Two lights plus a required transformer will set me back $1700 or so (nothing is cheap in the world of pools) but with the pool already partially drained, and needing to fix the leak either way, it seems like a good time to take the plunge (no pun intended).

    1. Looks like Paragon is now owned by Pentair, and they previously sold a very similar-looking LED retrofit called the SlimLite. However, it appears that it has been discontinued. ↩︎
  • Gracefully Mighty Forces

    Gracefully Mighty Forces

    • Beans: Mighty Forces (blend)
      • Roaster: Gracefully Coffee Roasters (Baltimore, MD)
      • Origin: Sumatra, Colombia, Mexico
      • Roast level: Medium/Dark
      • Roast date: 2/4/2026
      • Purchase date: 2/10/2026 from Gracefully curbside café
      • First cup: 2/14 or 2/15/2026; last cup:
      • Tasting notes: Cocoa, honey, cinnamon apple
    • Pour-over with Ode grinder:
      • 20g coffee / 300g water (1:15)
      • Ode: 3
      • Water at 95°C
      • Size 2 V60
      • Recipe: Single Cup V60 Pourover, 60g bloom water and 60g pulses. Finishes around 03:00
    • AeroPress with JX Grinder:

    This is another blend where the specific beans used seem to vary depending on what is available at different times of year. The bag pictured on the web site, the web site description, and the actual bag in my possession, all show slightly different bean blends, although they all have Sumatra and Colombia in common. The coffee itself is just as advertised: bold and roasty. The AeroPress, in particular, produced a really nice, smooth, strong cup. This will probably be my office coffee for the next 2 or 3 weeks.

  • Random stuff

    I’m battling off-and-on dizziness again, similar to what I had back around the end of last year. Still unsure what causes it. As with last time, it’s not room-spinning vertigo, just more of a spacey, lightheaded feeling. Various things I’ve considered as possible causes:

    • Allergies/Environmental
    • TMJ issue (chewing/clenching/jaw tension)
    • Low blood pressure/low heart rate
    • Low electrolytes
    • Dehydration
    • Migraine
    • Eyestrain/squinting or possibly vision issue (do I possibly need glasses?)
    • Positional vertigo/motion sensitivity
    • Something I’m eating

    I’ve noticed that I rarely wake up dizzy. I often first notice it while eating breakfast, meaning that chewing/clenching (TMJ) or possibly diet could be factors. I suspect that the only way I’ll ever get to the bottom of it is to try to be scientific, keep notes on diet/environment/etc., and try to find some kind of correlation.

    I ran on Monday, Tuesday, and Thursday (today) this week. Monday was 6.5 miles. I felt stiff for most of it, hit the wall at around mile 5, and cut the run short by a half mile. For mile 6, I could only manage a pace of 13.5(!) minutes/mile. Tuesday’s run was 7 miles, and the best of the three. I paced myself well and finished strong. Today was also 7 miles, and better than Monday, but the finish was not as good as Tuesday’s. It was, however, my fastest average pace of the week, at 10:50/mile, which is still about 20 seconds/minute slower than what I consider my average pace under ideal conditions. The dizziness does affect my running to an extent, but I don’t think it’s directly responsible for “hitting the wall”. My working theory is that the latter is related to electrolyte/hydration imbalance, and something else is causing the dizziness.

    This winter’s house project is upgrading our home LAN. I am running low on ports (particularly PoE ports) so I’m adding an additional 8-port switch in a different part of the house, which will give me more capacity, and allow me to shorten a few wire runs. I’m also going to start upgrading some of the wiring from Cat-5e to Cat-6, starting with the “backbone” that runs from the FiOS ONT to the router and from the router to the switches. I’ve also replaced our old AP-AC-Pro wireless access points with new U7 Lites, which support WiFi 7. Once the new switch is in place, I’m going to move one of the old APs into the garage, to provide better coverage for outdoor cameras, and eventually support a smart garage door opener. Lastly, I may put an AP in the basement family room, and I want to clean up the wiring in the closet around our existing switch. We will see how much of this actually gets done. 😄

  • Gracefully Colombia Nariño

    Gracefully Colombia Nariño

    • Beans: Colombia Nariño
      • Roaster: Gracefully Coffee Roasters (Baltimore, MD)
      • Origin: Colombia (Cooperativa de Cafés Especiales de Nariño, Alvaro Gomez)
      • Roast level: Medium
      • Roast date: 2/4/2026
      • Process: Washed
      • Purchase date: 2/10/2026 from Gracefully curbside café
      • First cup: 2/12/2026; last cup: 2/27/2026
      • Tasting notes: Peach, pear, sugar cane
    • Pour-over with Ode grinder:
      • 19g or 20g coffee / 300g water (1:15.8 – 1:15)
      • Ode: 2 → 3
      • Water at 99°C → 100°C
      • Size 2 V60
      • Recipe: Single Cup V60 Pourover, 60g bloom water and 60g pulses. Finishes around 03:00

    I lucked out with the timing, and was able to pick up a bag of this microlot coffee last week. I’ve now brewed 4 or 5 cups of it. It is definitely very fruit/acid forward, and I’m finding that, at least for the moment, I like it best at 1:16. At 1:15, it was kind of like a little too much of a good thing. Someone posted on Facebook that it turned out really good with immersion (using a Clever Dripper) so I may try brewing it in the Switch to see how that compares.

    2/25: After my initial entry, I ended up going back to 1:15 for most of my cups. Eventually, it started tasting a little bit over-extracted at grind setting 2, so today, I backed off to 3. With a little over 90g of beans left, I brewed a larger cup (345g/23g) and it was very nicely balanced. I’ll brew 3 more like today’s, and that will use the beans up.

  • Farewell SnowCrete

    We have had quite the run of unusual winter weather here for the past couple of weeks. It started out on January 25 with several inches of snow, followed by a full day of sleet, resulting in densely-packed snow that the locals have affectionately dubbed “SnowCrete”. After that, we went into an extended deep freeze where temperatures barely made it into the 20s. As a result, the “SnowCrete” has stuck around for quite a while. Now, 16 days later, the cold snap has finally broken, and the stuff is starting to melt down.

    While the SnowCrete was more of an annoyance than anything else, there are a couple of things I’ll miss about it. It was packed down so hard that you could (mostly) walk right over it without sinking down. It was great for snowshoeing, and I managed to get out twice, hiking 3 miles the first time and 4 miles the second. It also worked really well with studded bike tires. In Patapsco Valley State Park, I could ride right over the unplowed pavement, on top of the snow. Contrast that to most snows we get, where the unplowed sections quickly turn into icy, rutty messes of footprints and bike tire tracks. After two weeks of SnowCrete, however, today was the day it ended. I rode my bike to work, and this morning, I was able to ride over the snow for one last time. This afternoon, I had to push the bike through the same section, with my feet and tires sinking down with every step. It was fun while it lasted, and we probably won’t see another snow like this for a long time. All the same, it will be nice to get back to some of my usual outdoor activities like mountain biking and geocaching.

  • Icy Bike Commute

    Icy Bike Commute

    I took my first bike ride after the big snow-and-ice storm and ensuing deep freeze last week. It was actually fairly warm out this morning (for this winter), with temperatures hovering just a few degrees below freezing. I trotted out my old Specialized Rockhopper for the occasion, which I hadn’t ridden since last winter. The chain had a little bit of surface rust, and could use a good cleaning, but I just shot some lube on it for today. The bike rode fine. I used to ride it year-round, but lately, it has been a winter-only bike. I have two wheelsets for it, one with studded tires, and one with regular tires, and I haven’t used the latter in 2 or 3 years. Since that one is a newer wheelset, I might end up moving the studs over to it, as the 1995-vintage freehub on the old wheelset tends to occasionally “miss” in colder weather. But, I’m going off on a tangent…

    I had scoped this morning’s ride out by car on Monday, and determined that it was doable. Back in the day, it wouldn’t even have been a question, but at my current age, I’m more invested in staying upright, and thus a little less adventurous about road riding in adverse conditions. As usual, the best part of the ride was the segment through Patapsco Valley State Park. Most of the roads running through the park, as well as the Grist Mill Trail, were plowed down to bare pavement and in great shape. The exceptions were River Road between the Avalon day-use area and Orange Grove, which had in inch or two of crusty, compacted snow, and the River Road entrance on the Howard County side, which never gets plowed. Typically, after a snowfall, the latter turns into a big mess of icy footprints and bike tire tracks. This snow, though, was so hard and crusty that very little had broken through it in over a week. That will change as it starts to thaw, but with another cold snap coming, we may have several more days of these conditions. The entrance road is mostly downhill, and it’s hard to regulate the speed of the bike in icy conditions, so I put my Yaktrax on and walked it out of an abundance of caution. Once inside the park, River Road was rideable with care. I did stop to walk one or two downhill segments, but by the time I got out near the swinging bridge, I was riding more confidently. It’s been a really long time since we’ve had hard-packed snow like this, and I don’t think it has ever stuck around for as long as it has this winter. It is almost tailor-made for studded tires. Yaktrax and snowshoes work great on it too, and I saw a number of tracks (actually more like indentations) from both.

    The river was almost completely frozen over today, with the exception of a narrow area of flowing water around the swinging bridge. Parts of the surface looked like glass, and parts had ice shards that looked kind of like diamonds. It was quite beautiful. I took my time getting to work, and stopped for a few photos along the way. I’m looking forward to the ride back home in a couple of hours.

  • Tehila Single Origin Ugandan

    Tehila Single Origin Ugandan

    • Beans: Uganda (single origin; Arabica; 12oz)
      • Roaster: Tehila Coffee (Baltimore, MD)
      • Origin: Uganda
      • Roast level: Medium
      • Roast date: Unknown
      • Process: Washed
      • Purchase date: 11/29/2025 at 12th Annual Sykesville Holiday Market in Westminster, MD
        Freeze date: week of 12/1/2025
        Thaw date: 2/2/2026
      • First cup: 2/3/2026; last cup: 2/13/2026
      • Tasting notes: Earthy (aroma)/Fruity/Chocolate
    • Pour-over with Ode grinder:
      • 20g coffee / 300g water (1:15)
      • Ode: 2
      • Water at 99°C
      • Size 2 V60 or Size 3 Switch
      • Recipe: Single Cup V60 Pourover, 60g bloom water and 60g pulses. Switch: bloom with drain closed, open drain at end of bloom – finishes around 03:15

    My wife picked a bag of this up at the Sykesville Holiday Market back in late November. From the roaster’s Facebook page: “I’m a specialty coffee artisan devoted to crafting coffee with purpose and passion. Every bean we source is hand-selected for its flavor, quality, and story — because great coffee starts at the origin and deserves to be honored all the way to the cup.” I brewed one or two cups around the end of November, but didn’t take any notes. I then froze the rest, as I was about to go out of town, and had a surplus of beans at the time. To make a long story short, I finally took them out of the freezer yesterday. I brewed them with the same settings I used for a recent bag of Tanzania Peaberry beans, and it was a good cup. It had a smooth, round mouthfeel and good body. As with a couple of other African coffees I’ve brewed, I didn’t detect much fruitiness, in spite of the stated tasting notes. I’m wondering if a different brew method would bring more of those out. I might try a cup or two in the Switch, but probably won’t experiment much more beyond that.

    2/5: Tried the Switch this morning, with drain closed for bloom phase (3x coffee weight for 45 seconds) and then pour-over with drain open. I think I liked it a little better than straight V60. Hard to put a finger on it, but with some African coffees, the full-immersion bloom step seems to do something to bring out a slight amount of acidity/complexity. Of course, it’s also possible that I’m imagining things.

    2/13: I ended up brewing all of my subsequent cups with the Switch, and all of them were smooth with just a tiny hint of acidity. My final cup was a little bit stronger, as I had 21g beans left, and forgot to add extra water to keep it at 1:15. I liked this a lot, and I wonder if I’ll have an opportunity to buy the beans again at some point. I get the sense that it’s a one-person roasting operation.

  • Cool Runnings

    Cool Runnings

    We are in the midst of the longest deep freeze here since probably the 1990s. I remember in the winter of either 1993 or 1994, we had a very similar weather pattern to the past week’s, with a disruptive snow/ice storm and a long ensuing stretch of below-freezing temperatures. Just like this year, schools were shut down for at least a week (probably longer, actually). I remember going in to UMBC one day while the campus was still closed, just to shake off the cabin fever. Fortunately, as I’ve previously written, I have a couple of low-traffic back roads near me that I can use for running, as most of the sidewalks around here are hopeless at the moment. Last winter, I ran once when the weather was under 20°F, and so far this winter, I’ve been out 3 or 4 times in those conditions. Based on what I wrote last year, I made a few tweaks to what I have been wearing:

    • Relaxed fit Kühl running pants over 32°F synthetic leggings (same as last year)
    • Injinji Snow calf-height toe socks, Correct Toes, and Xero Mesa Trail WP shoes with Tuli heel cups (same as last year, plus the heel cups)
    • Smartwool neck gaiter with The North Face fleece headband (vs one-piece fleece balaclava last year)
    • REI long-sleeve merino wool base layer shirt (vs 32°F synthetic base layer last year)
    • REI lightweight liner gloves (vs heavy winter gloves last year)
    • Top layer variations:
      • Long-sleeve polyester/rayon/cotton athletic top + Patagonia R1 jacket
      • Long-sleeve lightweight bamboo/polyester/spandex hoodie + R1 jacket
      • R1 jacket + Arc’teryx Norvan Gore-Tex outer shell with hood

    Same as last year, I used Vaseline on exposed areas of my face (mainly cheeks and nose) and it worked great as a wind barrier. I’m going to try to remember to do this any time the temperature is below freezing and there’s any wind. I just have to remember to wash my face afterwards.

    Overall, I tried to improve on things that I noted were issues last year, and I think I succeeded. The gaiter with headband worked better than a heavy 1-piece balaclava. My feet stayed nice and comfortable, and my hands also were perfectly comfortable with just the thin gloves (I even took them off a couple of times). The wool vs synthetic base layer was a push comfort-wise, but wool is more odor-resistant, and I’m able to wear the wool base layer for more runs before I have to wash it.

    I’m finding that I like to run with a hood in below-freezing weather. The one time I ran without one, I was missing it. The lightweight hoodie worked well, as did the Gore-Tex shell. In the future, I wouldn’t mind getting a jacket similar to the R1, but with a hood.

    My 2 most recent runs were 10K and 8 miles, respectively. I still work up a pretty good sweat each time, and I’m still having issues with my energy dropping off during the second half of the runs. Could be hydration, could be electrolytes, could be pacing, could be something else. Running with a hydration pack could be an option, but I’d need to figure out how to keep the hose from freezing. An insulated water bottle would be too bulky to carry, and my soft water bottle would be a solid block of ice after 30 minutes.

  • Snowshoes

    I’ve had a pair of snowshoes since 2016. They were a birthday gift from my wife. That was the year of the January 2016 blizzard, which dumped over 2 feet of snow, and the snowshoes saw a good bit of use that winter. Since then, though, they have mainly collected dust, as we have yet to have any snowfalls even approaching that magnitude. This past weekend, though, we got a storm that dumped around 11″ of snow, followed by several hours of sleet. The result was a hard-packed snowfall with a crusty glaze of ice on the top. I remember as a kid, we got a snowfall like that one year. We had a metal realty sign sitting around (can’t recall why we had it or which realty it was for) and I repurposed it as a sled. My parents’ lawn was not what you would call steep or hilly, but it had a very slight slope to it that was enough for gravity to carry me from one end to the other while sitting on that metal sign. I did it over and over, and it was tons of fun. This type of snow is not good for walking or hiking, as the icy layer is slippery, and my feet often tend to punch through, making for a laborious slog. However, it is perfect for snowshoeing. The snowshoes distribute my weight over a larger area, reducing (though not totally eliminating) the punch-through issue. They also have spikes to provide traction on the ice.

    Today, I carried the snowshoes to the trailhead about a half mile from home, where I often go to take short hikes or ride my mountain bike. I hiked a 2-mile loop, and really enjoyed it. The forest is beautiful with the snow cover and the shiny, crusty glaze of ice. There were some human footprints near the trailhead, but farther in, I only saw animal tracks (likely deer). I’d estimate that I was able to go at about 70-80% of my usual hiking speed, which wouldn’t have been possible without snowshoes. We are in the middle of a really arctic cold snap, with lows in the single digits and highs in the low 20s, and everything was frozen solid, which made it relatively easy to cross the 2 or 3 streams along the way. I lost the trail in a few places, but was able to pick it back up each time with the help of the trail map on my phone. It also helped that I’m highly familiar with these trails. I also snowshoed here back in 2016, when I didn’t know the trails as well, and it ended up being more of a random walk through the woods. I had much better luck today, and really enjoyed the time outside. It was a great way to shake off the cabin fever. If the opportunity presents, I may try to get out one or two more times while the snow is still on the ground.