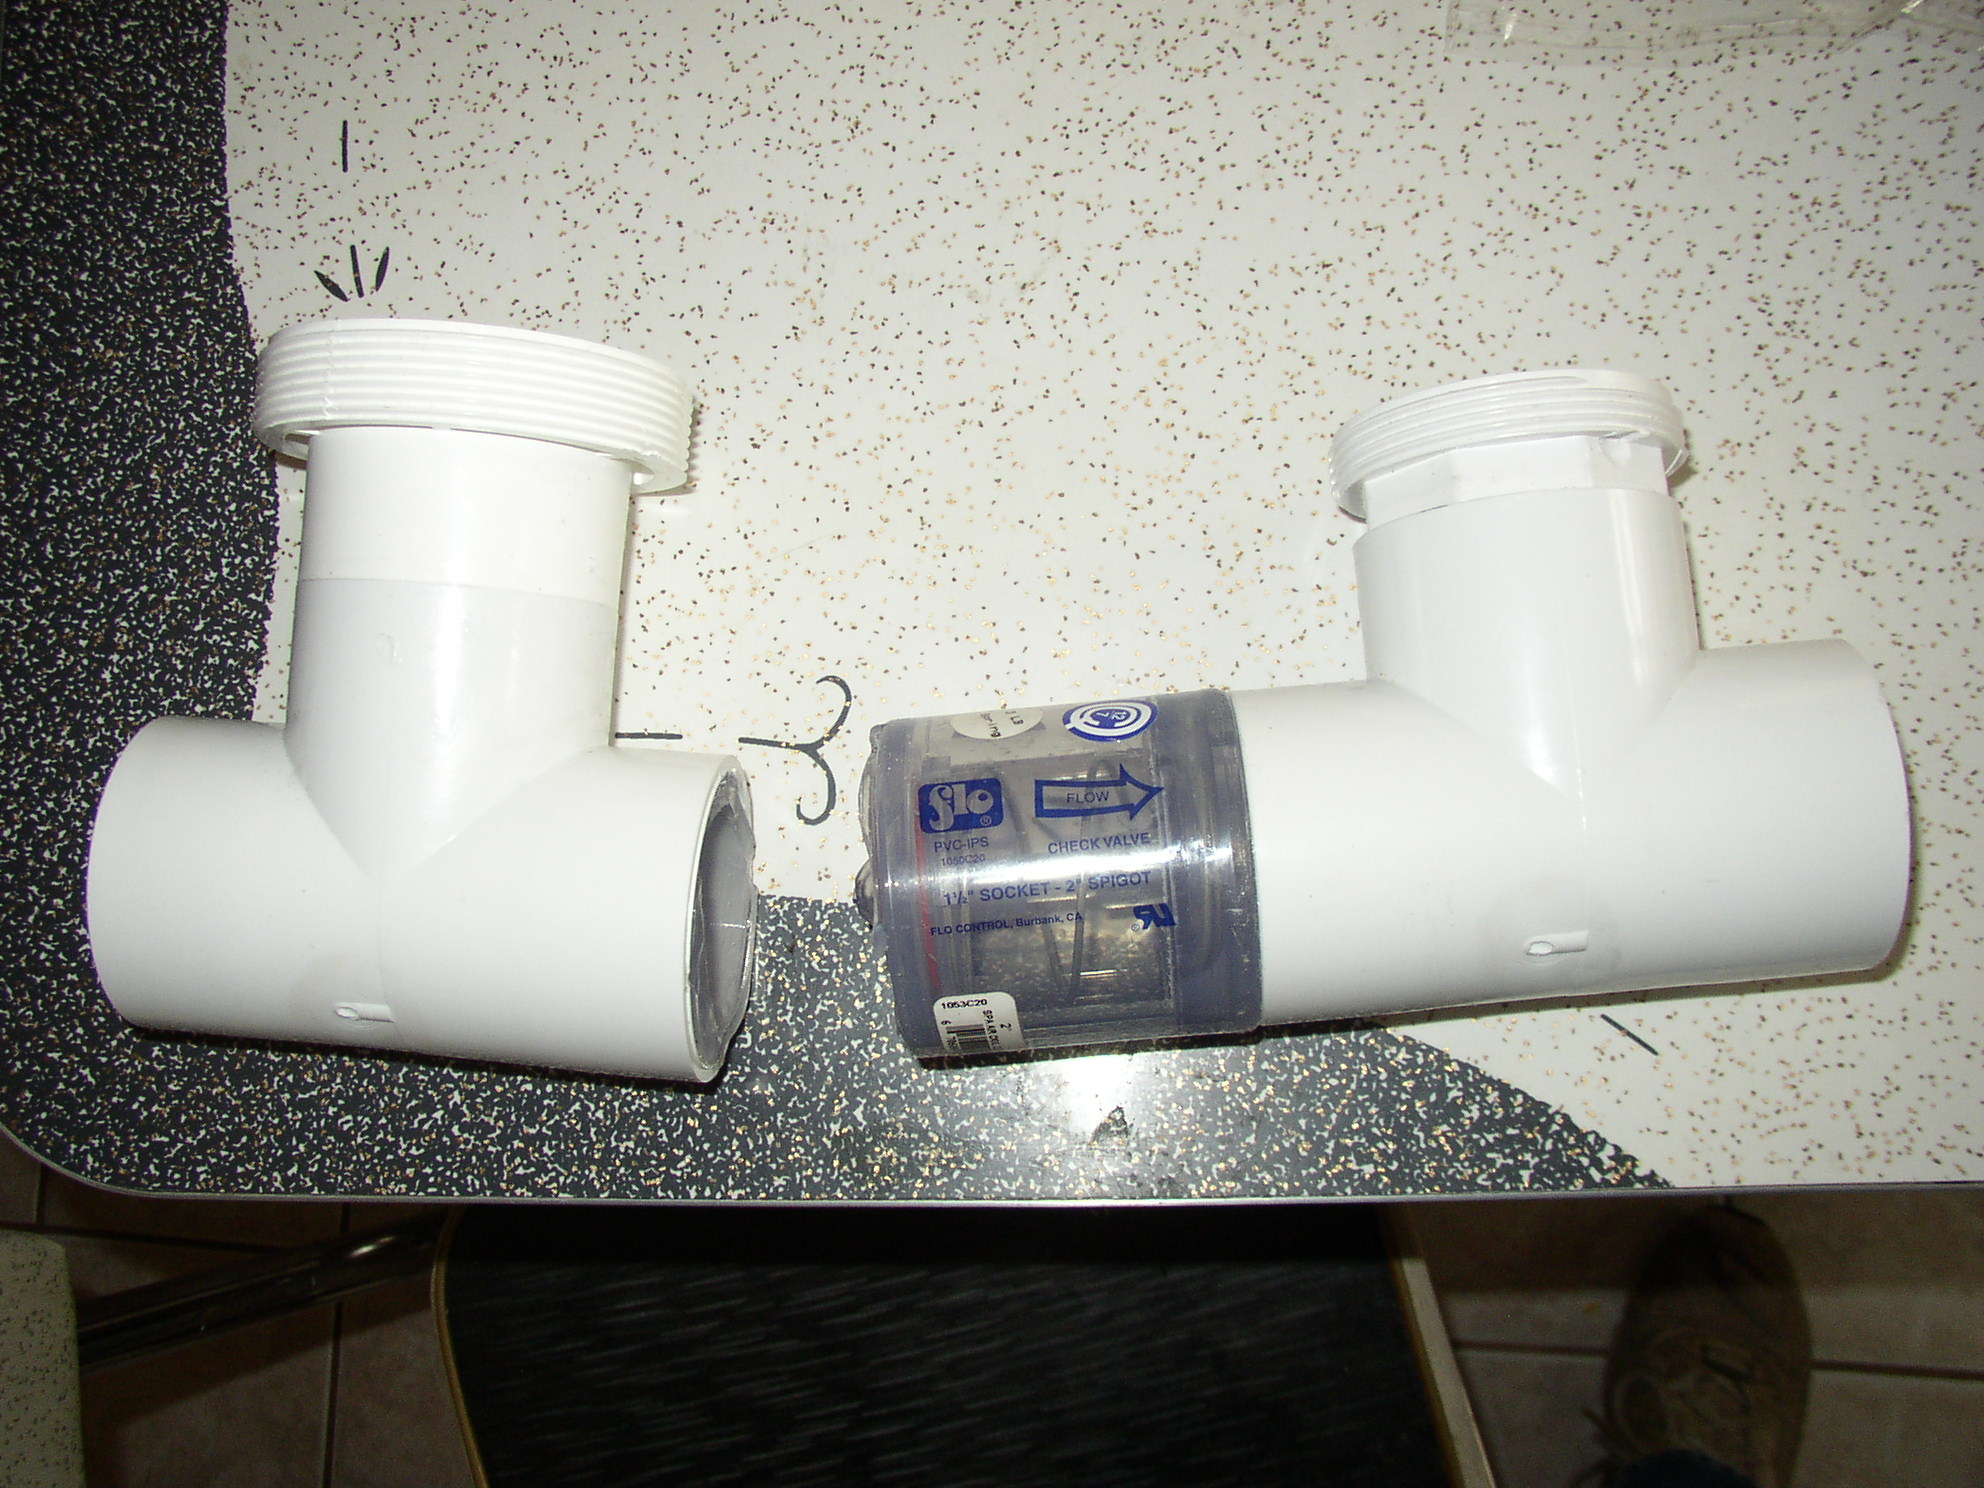
I’m in the process of installing a salt-water chlorine generator (model DIG-60 from AutoPilot) for my swimming pool. As part of this, I need to plumb the salt cell in downstream of my filter. The cell is part of a big inline manifold which includes a 3lb spring check valve. The valve’s purpose is to limit the water pressure going through the salt cell, theoretically extending the cell’s life. Anyhow, as I was preparing to install the manifold, I dropped it (don’t ask) and the check valve broke away from one of its adjoining tees:

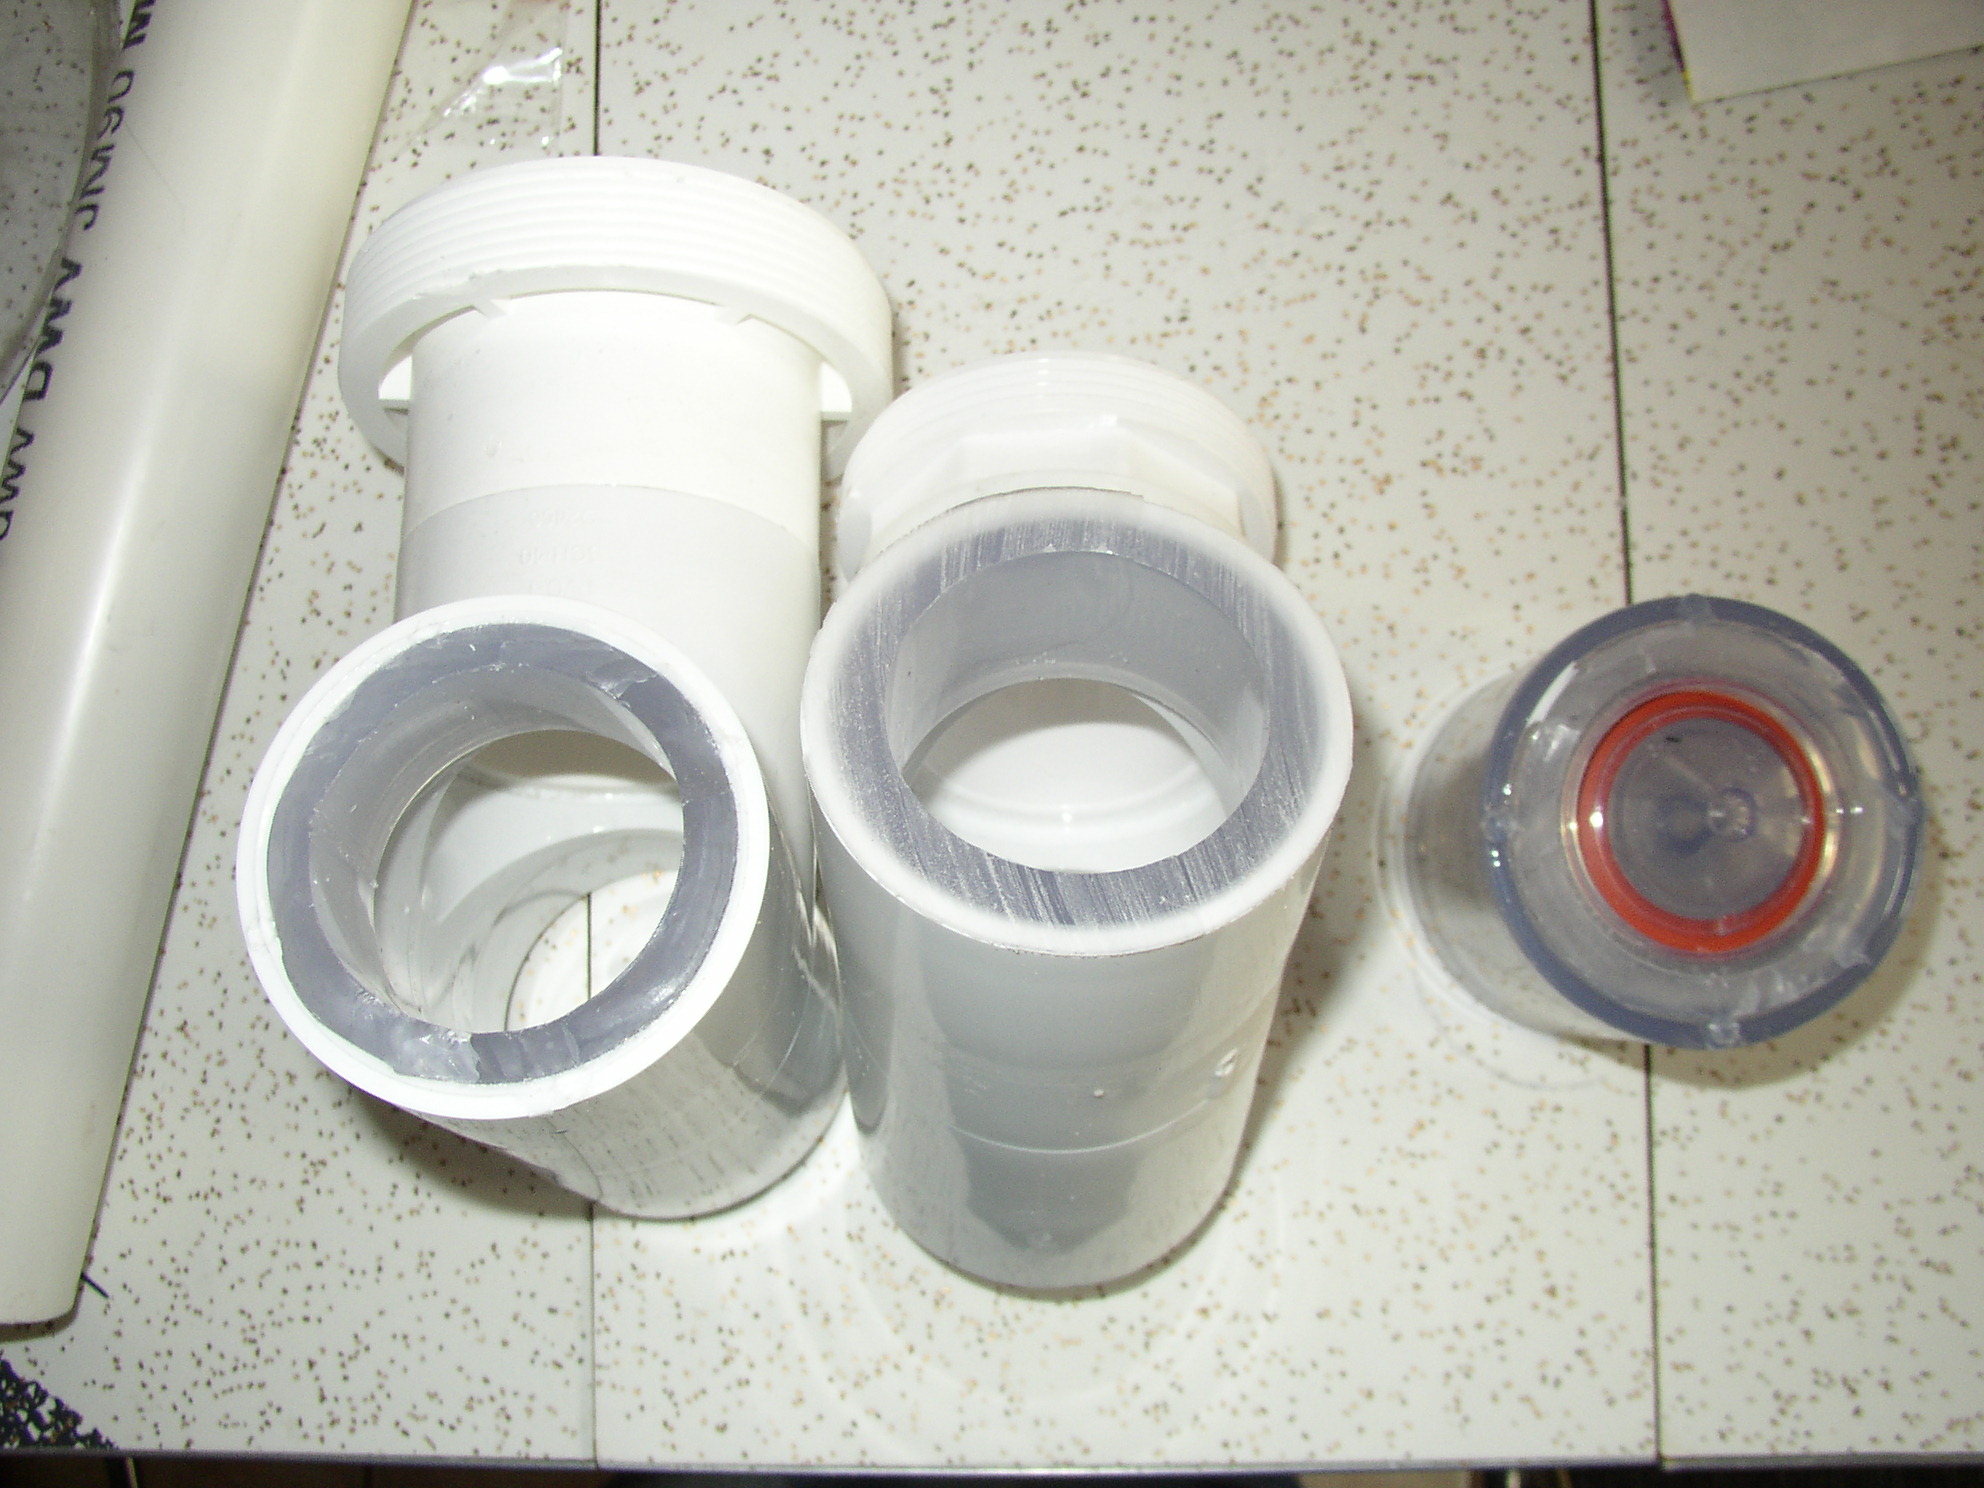
What to do here? The whole manifold is solvent-welded together, and the tees are attached to proprietary unions. At first glance there appeared to be no way to fix it other than ordering a replacement manifold, at a cost of over $100. By contrast, a replacement check valve can be had online for $15-20. So I decided to think outside the box a bit. The check valve is made by Flo-Control and is commonly sold as an air check valve for spa blowers. It has a 1½” socket and a 2″ spigot, meaning one can either attach a 1½” pipe “inside” it, or a 2″ pipe “around” it. AutoPilot ships it with 2″ tees cemented to either side, which attach to the pool’s plumbing. My pool has 1½” plumbing, so I would ordinarily need a reducer bushing to attach to the tees on the manifold. When the manifold broke, the 1½” socket end of the valve was left stuck inside the tee. Eventually, it occurred to me that if I cut the other tee away from the valve, I could flip the tees around and cement a new valve to the intact ends. The other ends, with the remains of the original valve, would then accommodate my 1½” plumbing without the need for reducer bushings. It seemed like a great plan, so I pulled out my trusty miter saw and cut the intact tee away from the old valve, leaving me with 3 pieces:

I then went online to look for a replacement valve, and promptly ran into another problem. It turns out that this particular valve is sold in a bunch of different spring weights: .75, 5, 10, and 15 pounds, to name a few. The version that ships with the AutoPilot has a 3lb spring. And here’s the problem: I wasn’t able to find the valve with a 3lb spring anywhere. It’s not even listed on Flo-Control’s web site. They’re apparently made special-order for AutoPilot.

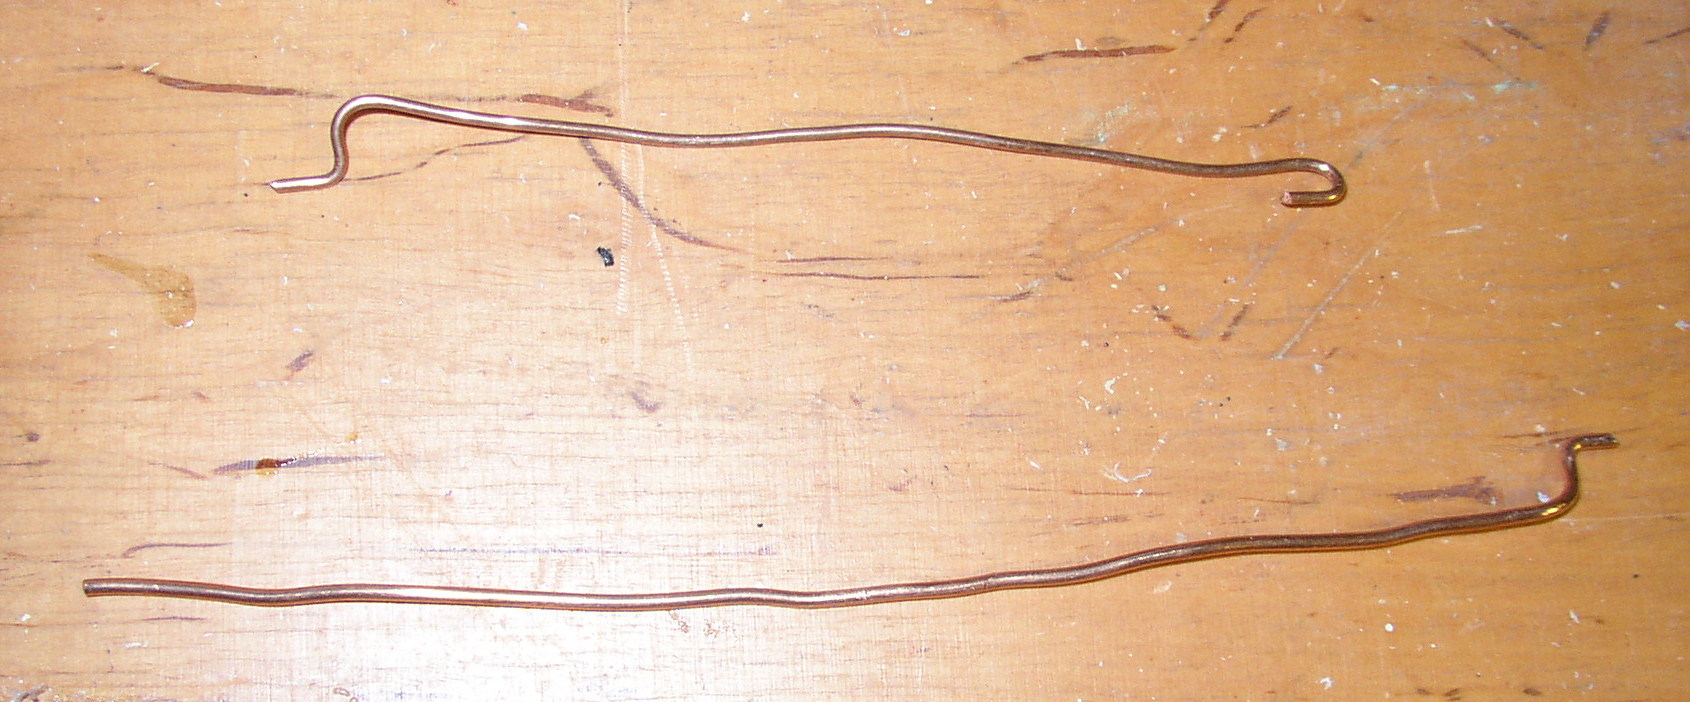
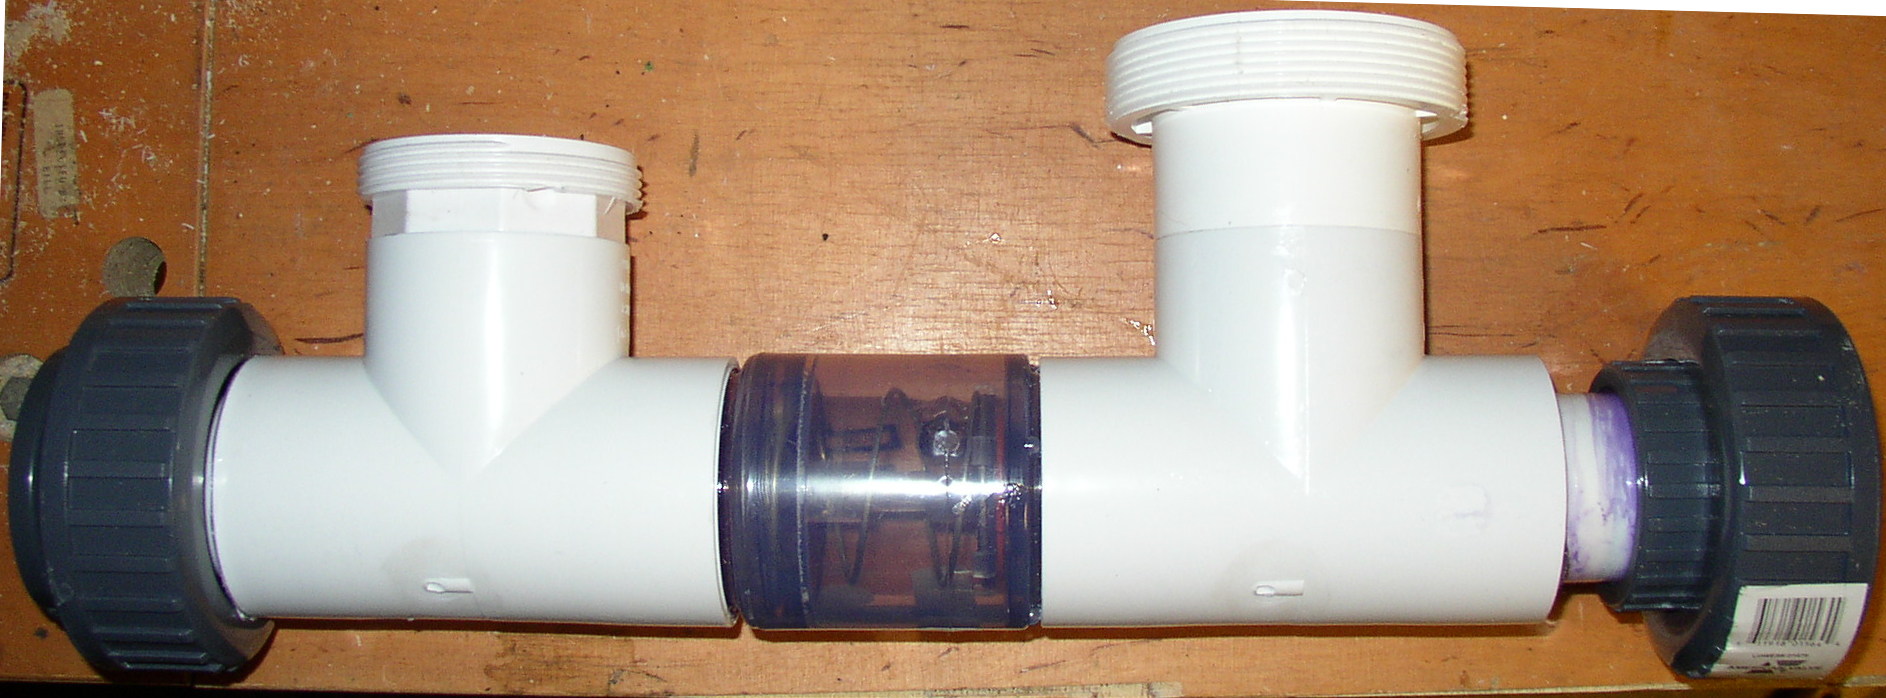
Undeterred, I wondered if I could remove the spring from the broken valve and reuse it in a new valve. With the help of a couple of makeshift “spring removal” tools I fashioned out of copper wire, I was able to extract the spring. As a proof-of-concept, I then replaced the spring with the help of some needle-nose pliers. Encouraged, I went ahead and ordered an identical valve with a .75lb spring. I chose the model with the lightest spring I could find, figuring it’d be the easiest to get out without damaging the valve. The valve arrived a few days later, and happily, it was identical to the original valve, other than having a different weight spring and not being broken. The lighter-weight spring easily came out of the new valve, and with a little effort I was able to insert the 3lb spring. Turns out direction matters when re-inserting the spring: it initially wouldn’t seat properly, but when I flipped it around it went right in. With that, I had a working, non-broken 3lb check valve. I then cemented the two tees onto either end of the valve, completing the repair:

All that’s left to do is plumb it in and make sure it works. Assuming it does, my little accident (dropping the manifold) cost me a lot less than I had feared.