Recently, I had occasion to convert a few shapes extracted from a flash movie to PNG format. I used the excellent swftools suite to extract the shapes from the movie, and then I used Gnash to render the shapes and save PNG format screen shots. This works great, but unfortunately, the resulting image is missing the alpha channel, and its background is white. I wanted a way to restore the shape’s transparent background.
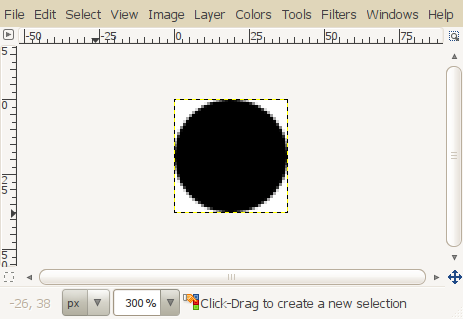
One easy way to restore transparency is to use GIMP to select all the white background pixels and “erase” them to make them transparent. Unfortunately, that’s not quite good enough. That’s because anti-aliased images have “semi-transparent” pixels around the edges, which show the white background underneath. If you just erase the white pixels, the semi-transparent pixels will leave artifacts around the image:
The above image is on a black background to highlight. Note the white artifacts around the edge of the circle.
To truly restore transparency and get rid of the artifacts, we need two images, one on a white background, and another on a black background. Then we can compare the images and average out the differences between the semi-transparent areas, thereby eliminating the artifacts. For flash shapes, it’s relatively easy to generate a container movie that displays the shape on a black background. You can do it with the “swfc” utility provided with swftools, and a script like this:
.flash filename="blackbg.swf" bbox=autocrop
   .swf temp "shape.swf"
   .put foo=temp
.end
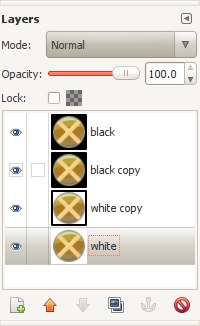
Load the two images into GIMP using the “Open as Layers” dialog from the File menu. Then duplicate each layer so that you have two copies of each image. Order the layers so that the 2 layers with black backgrounds are on top of the white layers:
For clarity, I’ve renamed the layers according to their background colors. Next, you want to hide “black” and “white” and select “black copy”. Then set the opacity of “black copy” to 50. The resulting image should be on a gray background, representing the average between black and white:
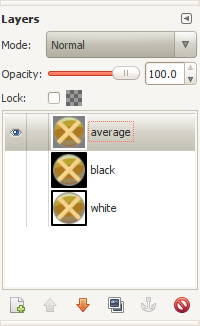
Now, merge the visible layers together (right-click on “black copy” and select “merge down”) to create a single layer containing the averaged background. Move this layer to the top:
Now, we want to find the differences between the black and white layers and use this to create a layer mask, which we’ll paste over the averaged layer. Hide “average” and show “black” and “white”. Select “black”, click on the “Mode” drop-down box, and select “Difference.” The result should look something like this:
The amount of white corresponds to how much the two images differ. The gray areas correspond to the anti-aliased pixels along the edge of the circle.
Now we’ll use this image to apply transparency to the top, averaged layer. Press Ctrl-A to select the image, then Edit – Copy Visible (or Shift-Ctrl-C). It’s important to “Copy Visible” and not just “Copy”, so we get the visual representation of the differences between the two layers. Otherwise it’ll only copy the active layer.
Hide the two bottom layers, so only the top “average” layer is visible. On the Layers dialog, right-click the top layer and select “Add Layer Mask.” Select the first option to initialize the mask to white (full opacity), and click “Add.”
Make sure the top layer is selected. Right-click on it in the layers dialog again and ensure that “Edit Layer Mask” is checked. Then, paste the clipboard into the layer mask with Ctrl-V or Edit – Paste. Finally, invert the layer mask with Colors – Invert.
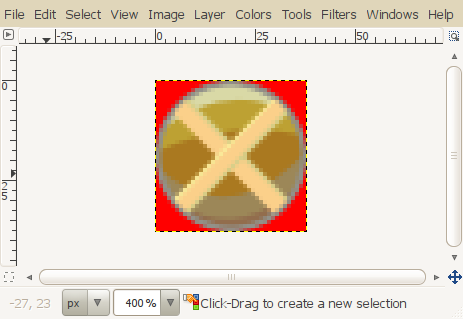
Here’s the result, shown on a red background to illustrate that the artifacts are gone.
And there you have it. Hopefully someone will find this useful!
Update… I found myself having to do this with a very large number of images. After spending a couple mind-numbing hours doing repetitive operations with GIMP, I figured out a way to script this using ImageMagick:
# produce averaged image
convert black.png -channel a -evaluate set 50% out$$.png
convert white.png out$$.png -flatten avg$$.png
rm out$$.png

# generate alpha mask
composite -compose difference white.png black.png out$$.png
convert -negate out$$.png mask$$.png
rm out$$.png

# apply mask to averaged image
composite mask$$.png -alpha off -compose Copy_Opacity avg$$.png output.png
rm mask$$.png avg$$.png
This works great, and looks to be a huge time saver.


