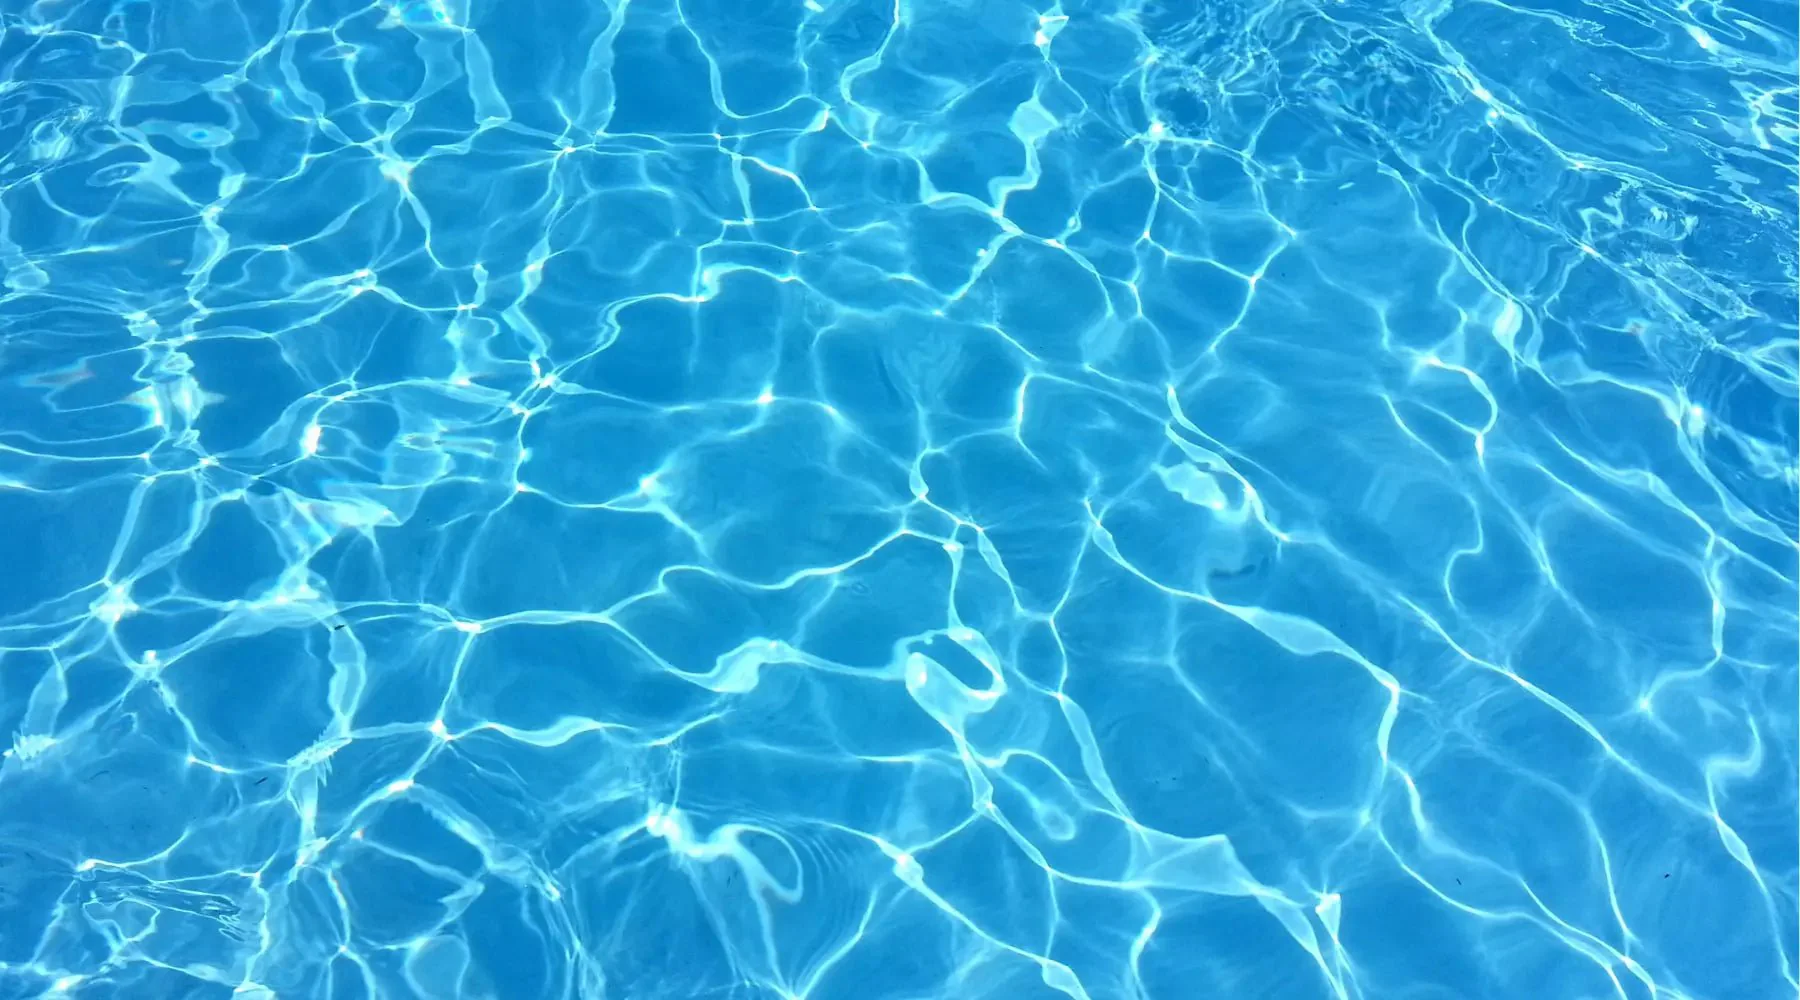
Fruddled Gruntbugglies

Enthralling readers since 2005

Blog

  • Instant Hot Water Tank Repair

    One of the must-have appliances in our kitchen is an instant hot-water tap. Once you’ve gotten used to instant cups of hot tea, you’ll never want to be without one. Unfortunately, while these gadgets are a great luxury, they have a reputation for being unreliable. The most popular brand, In-sink-erator, is well known for lasting 2 or 3 years before the tank starts leaking. Indeed, that’s what happened to ours, while it was still under warranty. We contacted In-sink-erator, and they helpfully shipped us a brand new tank at no cost. The only problem was that the new tank also leaked. The ultimate solution was to replace the In-sink-erator with a different brand, a Waste King. The Waste King seems like a better made unit, and it’s been working fine for a month or so now, but the jury is still out as to its longevity.

    With our family happily tapping instant hot chocolate again, I decided to take a closer look at the leaky In-sink-erator tanks. I wanted to pinpoint where they were leaking and see if I could repair them. It’s next to impossible to find leaks while the tank is in service, because it’s under the sink where it’s hard to get to, and the tank’s internal plumbing is hidden behind the case and the styrofoam tank insulation. The best way to find the leak is to take the tank and faucet out of service, remove the case and insulation, hook the faucet up to a temporary water supply, turn the water on, and look for the leak. The In-sink-erator faucet attaches to the water supply with ¼” copper tubing with compression fitting.  I went to my local Lowe’s and picked up a ¼” compression to ½” male NPT adapter, and a ½” female NPT to female garden hose adapter, and used these to hook the faucet and tank up to my laundry tub faucet. With the case and insulation off the tank, I was able to pinpoint the leaks in both my original and replacement tanks.

    The In-sink-erator tanks have a well-known issue where the plastic tubing fails between the tank and the backflow reservoir.  It turned out that this wasn’t the problem with either of my tanks.  On both my tanks, the culprit was a plastic bulkhead fitting: the original tank leaked at the water supply fitting at the top, and the replacement leaked at the drain fitting on the bottom.  These fittings don’t appear to be serviceable, so the only option appears to be to replace them with higher quality bulkhead fittings.  In the meantime, I salvaged a useable tank by using the top half of the replacement with the bottom half of the original.  We’re happy with the Waste King dispenser for now, but if and when it fails, we now have a working In-sink-erator that we can fall back on.

  • 2012 in review

    I ended up 2012 with around 155-160 rides (I got lazy about recording my rides at the end of the year, so I don’t have an exact number).  I may stop keeping track of individual rides in 2013 because I’m not getting much out of it any more — I’ll continue to track mileage, mainly because it’s useful for knowing when to replace tires, chains and things like that, and I may “check off” days that I rode, just to have a count…  but anything beyond that seems superfluous.  OK, maybe I lied.  I recently installed “Runkeeper” on my iPhone, and I’m using it for tracking my runs.  It apparently also works for cycling, so I’ll probably give it a shot.  If it’s easy and seems useful, I’ll let it keep track of my ride stats for me.  Point being, I’m done manually recording detailed ride stats, other than total mileage.

    I’m on the tail end of my 2-week holiday break, and I missed my last couple of rides to work due to illness, so I haven’t been on a bike for a while.  I just got my mountain bike ready for winter.  It’s now sporting studded tires, platform pedals with power grips, and my latest new gadget: Bar Mitts.  Bar Mitts are large neoprene sleeves that cover the entire end of the bars, including brake levers and shifters.  You stick your hands into them kind of like a giant oven mitt, and they’re supposed to create a wind barrier that keeps your hands warm.  The weather forecast for my first day back at work (Thursday 1/3) is looking cold, so I’ll likely get to test the Bar Mitts out soon.  Once I’ve ridden with them a couple of times, I’ll post a review.

  • That time of year again..

    We’re now halfway through November, so I’m once again riding home at dusk.  I leave UMBC at 5:00 and get home around 5:45.  By Thanksgiving, the sunset will be pushing back towards 4:45.  At our latitude/longitude, the earliest sunset is about 4:44pm and usually falls around December 9-10.  So the next few weeks will be my darkest rides home of the year.  I’m riding with the same lighting setup as last year:  a Planet Bike Blaze 2w and 1w both mounted on my front bars; a Blaze ½w on my helmet; 3 red flashers (various brands) mounted on the back of the bike (1 on each pannier and one on my rack); and a flasher on the back of my helmet.  I’ve been really happy with this setup.  In particular, the helmet-mounted headlight is great.  It’s not enough to light up the road ahead by itself, but it lights up wherever I happen to turn my head.  It’s great for making turns, because I can turn my head to light up the section of road where I’m about to turn, before it’s illuminated by the main headlights.  It’s also good for lighting up objects to either side of the road, looking at my cyclometer, chain/drive train, etc.  I find it particularly useful in areas without a lot of ambient lighting.  The Planet Bike lights have a very user-friendly mounting bracket, which makes them very nice for commuting.  It’s easy to move them back and forth between bikes, take them off when locking up the bike, etc., and if necessary, I can use one as a flashlight.  The lights also use standard AA batteries.  I use NiMH rechargeable batteries, which work great.  I steer clear of lights that use proprietary battery packs, because they tend to be expensive to replace.

    In other news, I bought a new jacket this year too.  It’s a Novara Conversion Jacket (REI house brand) with removable sleeves.  I’ve always been a fan of removable sleeves, particularly in Spring and Autumn.  I had a similar jacket that I bought from Performance, but one of the sleeve zippers broke after about a year.  The REI jacket was about $15 more than the Performance version, but it’s better made in almost every way.  The zippers are higher quality, and it also has front pockets and a hanging loop on the collar, all of which the Performance jacket lacked, and the material seems higher quality.  I’ll be sure to post more about it after I’ve ridden with it for a while.

  • October Post

    I needed to get a blog post in for October, to keep my streak alive: I have managed to write at least one blog entry each month since late 2009.

    We just survived Hurricane Sandy, which was reportedly the largest storm ever to strike north of Cape Hatteras, and also it’s been quite some time since the Mid Atlantic was impacted by a hurricane this late in the year.  But then again, my memory only goes back to Hurricane Floyd in the late 1990s.  All in all, Sandy wasn’t too hard on our immediate area.  We got lots of rain and wind, but in general, it wasn’t as much of an impact as the Derecho that hit us last June, or the one-two punch of Hurricane Irene and Tropical Storm Lee in Summer 2011.  It was our second hundred-year storm in a row.  Statistically speaking, we should be good to go now until, oh, the year 2200 or so.

    I took my bike through Patapsco State Park, and it was a big mess, as it always is after large rainfall events.  The river was running high and fast, and there were 8 or 9 downed trees on the Grist Mill Trail, as well as one huge mudslide.   The carnage was all on the lower section of the trail, between the swinging bridge and Lost Lake.  The upper Grist Mill, between the swinging bridge and Ilchester Rd, was clear, as was River Rd from the Avalon day use area out to the swinging bridge.

    I then took River Rd from the park out to Frederick Rd.  The road had some mud and standing water in spots, but was otherwise in good shape.  The problem was that Thistle Rd was closed off (probably a fallen tree; I didn’t investigate) so there was a ton of car traffic diverted onto River Rd.  I took Frederick Rd down towards Ellicott City, and up Oella Ave., which was in good shape.  The No. 9 Trolley Trail was clear from Oella Ave. to its terminus at Chalfonte Dr. in Catonsville.  In Catonsville, Asylum La. was blocked off due to downed trees and power lines, so I had to detour onto Valley Rd. to get to UMBC.  I’m sure conditions will improve over the next several days.

    In other news, my office is going to be moving.  I am staying at UMBC, but I’m moving from a building with nice, easy, ground-level access to my office, to a 6th-floor office which will require me to take an elevator.  This is going to require some changes to my bike commuting routine, so stay tuned for some new tips as I get settled in over the next several weeks.

  • Chain Joinery – Fixing stiff links

    I’m still working on getting everything working smoothly with my old ’93 Specialized Rockhopper, after replacing the chain, cassette, front cranks and sprockets.  To compensate for larger chainrings, I ended up having to add a couple of links to my chain, and I thought I’d pass on a tip.

    I have always found it frustrating trying to put chains back together with a chain tool.  I would always start by pushing the rivet all the way back into the link, and almost invariably, the link would end up so stiff I could barely move it.  I could never figure out how to get it loosened up properly.  My chain tool includes a secondary “ramp” for fixing stiff links, but it never seemed to do me any good.  It would spread the link apart a little bit, but the link would remain stiff.  Working the chain back and forth laterally, as recommended on various web sites, didn’t work for me either.  It was very frustrating, until I came up with the following strategy:

    1. Begin reassembling the chain with the chain tool as you normally would, except instead of pushing the rivet all the way into the link, tighten the chain tool only about 1 full turn or so, just so the rivet goes in far enough to hold the link together.
    2. Remove the chain from the tool, and verify that the link moves freely.
    3. Put the chain back in the tool (regular position, not “stiff link” position) and tighten another ¼ to ½ turn.
    4. Repeat steps 2 and 3, pushing the rivet in just a tiny bit each time, and testing the link, until you feel the link start to stiffen up.
    5. Put the chain into the “stiff link” position on the chain tool.  Usually, this is the position closest to the crank handle.  Tighten handle around ¼ turn, just enough to slightly spread the link.  Never turn the handle more than ¼ turn in this position, or you may distort the link.
    6. Remove tool from chain.  Check to make sure the link has loosened up.
    7. Continue to push the rivet into the link little by little, checking the link for tightness each time (steps 2-3), and loosening it up as needed (steps 5-6), until the rivet is all the way in the link.  That should do it!

    I’ve had great success with this method.  The trick is to keep the link loose by making small, gradual adjustments, rather than trying to free the link up after the rivet has been inserted all the way.  Good luck and happy riding.

  • Drive Train

    We’re now about midway through September.  The first week of September featured weather similar to the inside of a gym locker room.  This past week, the weather has been beautiful.  We’ll see what the rest of the month holds.

    I haven’t ridden my mountain bike since I broke my chain a few weeks back.  I put a new chain on, but then I decided I should also replace the drive train.  The cassette and chainrings were all mid-1990s vintage, and probably completely worn out.  I wouldn’t be surprised if they contributed to the chain’s demise.  So anyhow, replacement 7-speed MTB cassettes are pretty cheap online.  I bought a new SRAM cassette for around $17.  We’ll see how it holds up.  The gearing is a bit different from my old one; the small cog has 12T vs 13T on the old cassette, which will give me a slightly higher gear going down hills.  The largest cog is also larger, giving me a lower gear for climbs.  I don’t really need a lower gear on this bike with the kind of riding I do, but as you can imagine, there isn’t a terribly wide selection of gearing choices in 7-speed cassettes nowadays.  This was about the best I could find given how I’m going to ride it.

    Buying new chainrings was an interesting lesson in economics.  It’s very hard to find replacement chainrings for old cranksets, and when you do, the cost of 3 new ones often adds up to more than the price of a brand new crankset (which includes the chainrings).  There was nothing wrong with my existing crank, but I ended up replacing it, because it was cheaper than buying 3 new chainrings separately.  The new crank is a Shimano Acera M361, with the same specs and gearing as the old one, and a chain guard to boot — I am a big fan of chain guards now that I’ve had one on my road bike for awhile.  One thing to be aware of, is that some of the cheaper cranksets have the chainrings permanently riveted on.  If you have any intention of replacing chainrings as they wear out (which is more likely if you do a lot of riding), you’ll want to stay away from these.  Of course, if you’re like me and wait 18 years to swap chainrings, it won’t matter, because you’ll be replacing the cranks anyhow.  🙂

    I’ve got the parts installed on the bike, but still need to readjust the derailleurs and get it shifting smoothly.  Once I do, I’ll report back on how the bike rides.  I’m hoping it’ll be an improvement.

  • Summer’s End

    Labor Day weekend is looming, the kids are back in school, the traffic is back in the mornings, and multiple tropical systems are swirling around the Atlantic.  Must be the end of August.  This time last year, we had just survived Hurricane Irene, and were bracing for Tropical Storm Lee.  Hopefully, September 2012 will be less exciting.

    The dog days of summer weren’t particularly kind to my riding this year, as they have been in years past; but I did manage to finish August up with 14 rides.  If the weather cooperates, September can be a pretty good riding month, so we’ll see how that works out.  I’ve got a couple of business trips coming up in October that will likely cut into my ride totals that month.  My original goal of 180 rides this year is looking less likely, but that’s OK.  I am trying to get a little less goal-oriented about my riding, particularly as I’m cutting back on it a bit (at least distance, if not frequency) to do some running and other cross-training.

    With all the extra school traffic now, I’m once again steering clear of Montgomery Road in the mornings.  Today, I cut through CCBC Catonsville again, the same route I took on April 20 and one or two other times since then.  It’s still a good route, but boy is it hilly.  Actually, most of my rides that avoid Montgomery Rd seem to be hilly.  It’s just the price you pay to stay out of traffic, I guess.

  • Breaking the Chain

    You’d think after 4 years of bike commuting, I’d have seen every bike malfunction possible.  But today on the way in to work, my chain snapped.  That was a first.  As Murphy’s Law would dictate, it happened while I was crossing an intersection in traffic, going uphill, trying to make a left turn.  At first I thought the chain had just fallen off the small chainring, but upon stopping, I found that one of the links had broken in half.  Only one side of the link broke, and the other side was a little bent from being pulled apart, so I’m wondering if it actually broke earlier, held together for awhile, and just decided to pull apart the first time I pedaled hard on it.  I’ll never know.  Fortunately, the multi-tool I carry with me includes a chain tool, so I was able to take out the bad link, put the chain back together, and ride the rest of the way to work.  The bike doesn’t shift as well with the shortened chain, though.  I’ll be hitting the bike shop soon, hopefully tonight, to pick up a new chain.  The funny thing is, earlier in the ride, I was thinking about how it was about time to replace the chain anyhow.  It had over 1000 miles on it and had started to stretch out a bit.  Well, I guess today kind of seals that deal.

  • Reboot

    I’m easing back into biking regularly after taking most of July off to rest my hip.  It’s still not 100%, but it’s manageable.  I honestly don’t think the time off the bike made much of a difference.  The soreness is in the front part of my left hip, and it happens on downward pedal strokes, as the hip is extending.  Lowering my seat a bit made a huge difference with this.  If the seat is too high, I get discomfort almost immediately.  With the seat lower, it seems to put less stress on the hip joint.  Occasionally it will bother me when I’m at rest, i.e. sitting at my desk or lying in bed; when this happens, a heating pad helps to relieve it.  I’m pretty sure I caused the injury riding fixed gear with my saddle too high.  It’s looking like my fixed gear riding days may be over.  All you 20-something hipsters out there, enjoy it while it lasts.  🙂

    On a positive note, the downtime from biking has allowed me to rediscover running.  After about 6 weeks, I’m to the point where I can run around 2 miles, barefoot or with minimalist running shoes, 2 to 3 times a week.  I’m hoping to be up to around a 5K distance by the end of the year.  This time of year, I have to run in the morning, so on days I plan to run, I’ve cut back on my morning biking mileage so I can get to work earlier and run.  This has worked out really well.  The reduced biking has helped with my hip, and the running works different leg muscles (calves in particular) that don’t see much action on the bike.  I’m hoping I can keep it up over the long term.

  • Barefoot Running

    For a while, I’ve been wanting to complement my biking with an additional form of exercise.  Many moons ago, I used to do a lot of running, but I gave it up a few years ago when I started commuting by bike regularly.  When I ran, I ran in heavily padded running shoes.  I would consistently overstride, my feet struck the ground heel-first, and I was always getting various nagging running injuries.  Some of my runs were good, some were bad, but in general, I didn’t enjoy it all that much.

    Flash forward to 2012, and I’m giving running another chance, except this time I’m trying “minimalist” running.  The past couple of years, we’ve spent a week at the beach each Spring, and each year I’ve done a little bit of barefoot running on the beach.  I enjoyed it enough that figured eventually, I’d give it a shot on a more regular basis.  It’s a totally different running motion than the long-stride, heel-strike motion that I used in the past, so over the last month or so, I’ve been easing into it slowly, and I figure I’ll still be easing into it for a good while yet.

    There are any number of good resources for barefoot/minimalist running on the web, so rather than regurgitating info easily found elsewhere, I figured I’d write a bit about my own personal experience with it.  In early June, I picked up a pair of Vibram FiveFingers (VFF) shoes, and wore them for my first few runs.  I subsequently read that the best way to get the running motion down, at least initially, is to run completely barefoot (Vibram themselves recommend this) so my past couple of runs, I’ve done barefoot.

    First time out:  ran about ¼ mile in the VFFs.  Not quite sure about the running motion.  Started out briefly heel striking, but corrected that pretty quickly.  Ran most of the way on the balls of my feet.  Long stride.  Calves pretty sore the next couple of days.

    Second time out:  ran another ¼ mile, mainly on the balls of my feet again, without touching the heels.  Still overstriding.  Calves sore for about 5 days afterward, so much so that it was hard to walk, and going down stairs was excruciating.

    Third and Forth times out:  Still in the VFFs.  Figured out that I need to touch my heels with each step to unload the calves.  Corrected that bit, but still overstriding, and under the impression that I need to use the calf muscle to propel myself forward.  In spite of this, my calves were much happier following this run, but my feet were starting to get a little sore after runs (muscle/tissue soreness, not skin).

    Fifth and Sixth days out:  Mileage up to around 1 to 1½ miles/run.  Ran barefoot for the first time.  A bit apprehensive at first.  Running surface is primarily smooth sidewalks with a few street crossings and a few rough spots.  Finally stopped overstriding, and increased my cadence to around 180 steps per minute.  Running motion feels very comfortable.  Calves are happy and foot muscle soreness is diminishing.  Only problem is a bit of blistering and abrasion on my soles from running on the rough concrete.  I’m sure this will improve over time, and I can fall back on the VFFs whenever it becomes a problem.

    My goal for the summer is to get my distance up to around 2 miles per run, and my longer term goal is to work up to 5K and 10K distances.  If I’m able to keep it up, and not injure myself, I could see doing 5K in 6 months or so, and 10K after maybe a year.